In the world of e-commerce, “one size fits all” rarely works. Whether you are selling custom-printed T-shirts, personalized jewelry, or professional editing services, your customers often need to provide their own assets—like images, documents, or videos—to complete an order.
By default, WooCommerce doesn’t offer a native way for customers to attach files to their purchases. So, how do you bridge this gap?
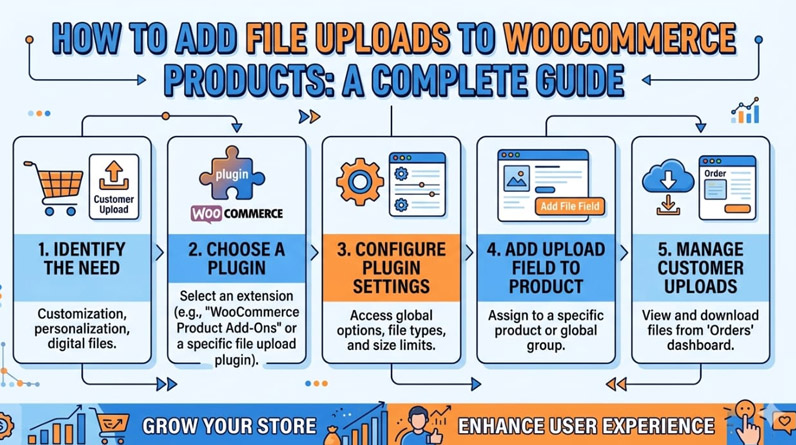
In this guide, we will show you how to upload file WooCommerce effectively to streamline your workflow and improve customer experience.
Why Allow File Uploads in Your WooCommerce Store?
Before we dive into the “how,” let’s look at the “why.” Adding a file upload option can transform your business by:
- Enabling Customization: Perfect for print-on-demand or personalized gift shops.
- Gathering Requirements: Ideal for service-based businesses (e.g., logos for graphic designers).
- Improving Accuracy: Reduces back-and-forth emails by collecting all necessary data at the point of sale.
The Best Solution: File Upload Plugin for WooCommerce by FMEAddons
To add professional-grade upload functionality, we recommend the File Upload Plugin for WooCommerce by FMEAddons. This robust extension allows customers to upload files not just on the product page, but also on the cart and checkout pages.
Key Features:
- Support for multiple file formats (Images, Videos, Audio, Docs).
- Customizable upload buttons and preview styles.
- File cropping and progress bars.
- Rule-based displays (restrict by product, category, or user role).
Step-by-Step: How to Set Up WooCommerce File Uploads
Step 1: Installation
- Download the Customer Upload Files for WooCommerce .zip file from the WooCommerce marketplace.
- Log in to your WordPress Admin Panel.
- Go to Plugins > Add New and click Upload Plugin.
- Choose the .zip file and click Install Now.
- After installation, click Activate.
Step 2: Configuring Upload Rules
Once activated, navigate to WooCommerce > Settings > Upload Files. Here, you will find the “Add Rule” section, which acts as the engine for your upload fields.
To create a new rule:
- Display Location: Choose whether the upload button appears on the Product Page, Cart Page, or Checkout Page.
- File Limits: Decide if you want to allow a Single file or Multiple files.
- Allowed Formats: Select from standard formats (jpg, pdf, mp4, etc.) or add a Custom Extension if you have unique needs.
- File Size: Set a Maximum Upload Size to prevent server strain.
Step 3: Advanced Logic and Restrictions
The FMEAddons plugin allows for surgical precision:
- Product/Category Restriction: Don’t want the upload button on every product? Limit it to specific categories (e.g., “Custom Apparel”).
- User Roles: Limit the upload feature to “Wholesale Customers” or “Subscribers” if necessary.
- Multiply by Quantity: If a customer buys 5 custom mugs, enabling this ensures they can upload 5 different designs.
Step 4: Customizing the Look and Feel
Navigate to Additional Settings to match the upload button with your brand’s aesthetic:
- Layout Styles: Choose between Default, Minimal, or Simplistic layouts.
- Button UI: Customize the background color, text color, hover effects, and padding.
- Preview Style: Select Display Thumbnail or Display Icon so customers can see what they’ve uploaded before hitting “Buy.”
Managing Customer Uploads as an Admin
Once an order is placed, managing the files is simple.
- The Upload Counter: Go to WooCommerce > Orders. You will see a new “Upload Counter” column that tells you at a glance how many files are attached to each order.
- Reviewing Files: Open a specific order.
- Files uploaded via the Product Page appear in the “Item” section.
- Files uploaded via Cart/Checkout appear at the bottom in the “Upload File” section.
- Approve/Reject: You can download the file, then mark it as “Approved” or “Disapproved.”
- Feedback: Use the Admin Feedback feature to tell the customer why a file was rejected (e.g., “Resolution too low”).
- Notifications: Always click Update Order after approving or rejecting; this triggers an automatic email notification to the customer.
Pro Tips for the “Upload File WooCommerce” Workflow
- Enable the Cropper: Use the “Enable Cropper” setting to let customers crop their images to the correct aspect ratio before uploading.
- Use the Progress Bar: Large video or high-res files take time. A progress bar prevents customers from refreshing the page mid-upload.
- Security First: Only allow the specific file types you need to keep your site secure.
Final Thoughts
Adding the ability to upload file WooCommerce products doesn’t have to be a technical headache. With the File Upload Plugin by FMEAddons, you can create a seamless, professional customization process that builds trust and increases conversions.