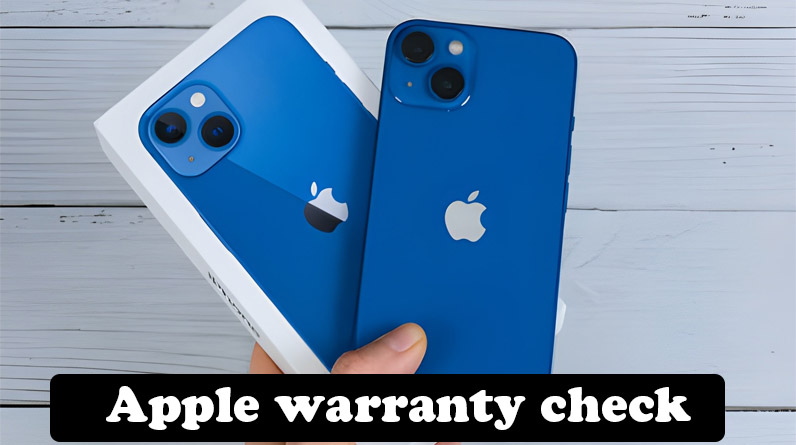
When you invest in Apple products—whether it’s the latest iPhone, a MacBook Pro, or AirPods—you’re making a significant financial commitment. Yet, surprisingly, over 40% of Apple users never check their warranty status until something goes wrong. By then, they often discover their coverage has expired, leaving them facing costly repair bills that could have been avoided.
Understanding how to perform an Apple warranty check isn’t just about knowing if your device is covered—it’s about strategic device management, maximizing your investment, and making informed decisions about repairs, upgrades, and additional coverage. This comprehensive guide explores everything you need to know about checking your Apple warranty, including methods most users overlook.
Why Checking Your Apple Warranty Status Matters More Than You Think
Before diving into the how-to, let’s address the why. Many users assume they’ll remember when their warranty expires or believe they don’t need to check until a problem arises. This reactive approach can cost you hundreds of dollars.
The Financial Impact of Warranty Awareness
Consider this scenario: Your iPhone’s battery health drops to 78%, just below Apple’s 80% threshold for free replacement. If you’re within your warranty period, this replacement is completely free. Miss that window by even a day, and you’re looking at an $89 out-of-pocket expense. For a MacBook logic board repair, the difference between warranty and non-warranty service can exceed $600.
Key benefits of regular warranty checks:
- Identify coverage windows for preemptive repairs
- Determine optimal timing for AppleCare+ purchase decisions
- Increase resale value by providing warranty documentation to buyers
- Plan your device upgrade cycle strategically
- Avoid unnecessary third-party repair expenses
Five Methods to Check Your Apple Warranty (Including the Least-Known One)
Apple provides multiple pathways to verify your warranty status, each suited to different situations and user preferences. Here’s a comprehensive breakdown of all available methods.
Method 1: Direct Device Check (Fastest for Current Users)
The most convenient method if you have your device in hand is checking directly through the device settings. This method works seamlessly across all Apple devices linked to your Apple ID.
For iPhone and iPad:
- Open the Settings app
- Navigate to General
- Select AppleCare & Warranty
- View your coverage status and expiration date
What makes this method particularly valuable is that it displays all Apple devices associated with your Apple ID, not just the one you’re currently using. You can tap on any listed device to view its individual warranty status—perfect for families managing multiple Apple products.
For Mac computers:
- Click the Apple logo in the top-left corner
- Select System Settings
- Choose General from the left sidebar
- Click on AppleCare & Warranty
Method 2: Apple’s Check Coverage Website (Best for Pre-Purchase Verification)
When buying a used Apple device or verifying coverage before a repair, Apple’s official Check Coverage tool at checkcoverage.apple.com is your go-to resource.
This method requires only the device serial number, making it ideal for scenarios where you don’t have access to the device itself or need to verify coverage for a device you’re considering purchasing.
Step-by-step process:
- Visit checkcoverage.apple.com
- Enter the device serial number
- Complete the CAPTCHA verification
- Click Continue
The results page provides comprehensive information including purchase date validation, hardware coverage expiration, telephone support eligibility, and repair service coverage status.
Method 3: Apple Support App (Best for Multi-Device Management)
The Apple Support app offers a centralized dashboard for managing warranty coverage across all your Apple devices. This free app is particularly valuable for users who own multiple Apple products or frequently help family members with device issues.
After downloading from the App Store and signing in with your Apple ID, navigate to the My Devices section. Each device displays its coverage status at a glance, and tapping on any device reveals detailed warranty information, available support options, and eligibility for AppleCare+ coverage.
Method 4: Apple My Support Web Portal (Ideal for Desktop Users)
For those who prefer working from a computer, support.apple.com/my-support provides a web-based interface that mirrors the functionality of the Apple Support app. After signing in with your Apple ID, you’ll see all registered devices with their respective coverage statuses, repair histories, and support options.
Method 5: Serial Number Physical Location Check (The Emergency Method)
When your device won’t power on or you don’t have access to the internet, you can still retrieve the serial number from physical locations on the device or its packaging. This often-overlooked method has saved countless users from thinking their warranty information was inaccessible.
Physical serial number locations:
- iPhone: SIM card tray, back of device (older models), Settings app
- iPad: Back of device, original packaging
- MacBook: Bottom case, About This Mac menu
- AirPods: Inside charging case lid, Bluetooth settings when paired
- Apple Watch: Back of watch casing, Watch app on paired iPhone
Understanding What Your Warranty Check Results Actually Mean
Knowing how to check your warranty is only half the battle. Understanding what the results mean and how to act on that information is where real value lies.
Decoding Coverage Status Messages
| Status Message | What It Means | Action Required |
|---|---|---|
| Limited Warranty | Standard 1-year warranty active | Note expiration date, consider AppleCare+ |
| AppleCare+ Coverage | Extended warranty with accidental damage protection | Utilize benefits, plan for coverage end |
| Coverage Expired | No active warranty protection | Self-pay repairs or third-party service |
| Coverage Verification Pending | Purchase date needs verification | Contact Apple with proof of purchase |
The AppleCare+ Decision: Using Warranty Checks to Maximize Value
One of the most strategic uses of regular warranty checking is determining the optimal time to purchase AppleCare+. Many users don’t realize that AppleCare+ can be added up to 60 days after purchase without any inspection—but timing matters significantly.
Strategic AppleCare+ Purchase Timing
Data from Apple retail stores indicates that devices experiencing issues within the first 30 days typically have manufacturing defects covered under standard warranty. Purchasing AppleCare+ immediately means you’re paying for coverage you already have.
The sweet spot? Days 45-60 of ownership. By this point, you’ve thoroughly tested your device, identified any immediate issues that would be covered under standard warranty anyway, and you’re approaching the end of the consequence-free purchase window.
AppleCare+ Coverage Comparison:
| Feature | Standard Warranty | AppleCare+ |
|---|---|---|
| Duration | 1 year | 2-3 years |
| Hardware Coverage | Manufacturing defects only | Manufacturing defects + accidental damage |
| Battery Replacement | If below 80% capacity | If below 80% capacity (extended period) |
| Accidental Damage | Not covered | 2 incidents per year ($29-$99 service fee) |
| Technical Support | 90 days | Duration of coverage |
| Express Replacement | Not included | Included |
Common Apple Warranty Check Mistakes and How to Avoid Them
Even with straightforward checking methods, users frequently make errors that lead to coverage confusion or missed opportunities.
Mistake #1: Assuming All Apple Products Have the Same Warranty Start Date
Your warranty doesn’t start when you purchase the device—it begins when Apple first sells it to a retailer or when it’s first activated, whichever comes first. This distinction is crucial for devices sitting in inventory or purchased as gifts.
Solution: Always perform a warranty check immediately upon acquiring any Apple device, even if it’s new in box.
Mistake #2: Relying on Third-Party Warranty Checkers
Numerous websites offer “free Apple warranty checks” using IMEI or serial numbers. While some are legitimate, others harvest device information for fraudulent purposes or provide outdated information.
Solution: Use only Apple’s official channels: checkcoverage.apple.com, the Apple Support app, or on-device settings.
Mistake #3: Ignoring Warranty Status When Buying Used Devices
The used Apple device market is massive, but many buyers focus solely on physical condition while neglecting warranty verification. A device sold as “like new” might have only weeks of warranty remaining, significantly affecting its true value.
Solution: Request the serial number from sellers before purchase and verify warranty status independently. A device with remaining AppleCare+ coverage can justify a higher price and provides peace of mind.
What Your Warranty Doesn’t Cover (And Why It Matters)
Understanding warranty exclusions is just as important as knowing what’s covered. Apple’s Limited Warranty specifically excludes several common damage types that users often mistakenly believe are covered.
Exclusions under standard Apple warranty:
- Cosmetic damage that doesn’t affect functionality
- Liquid damage (including water, coffee, or any moisture exposure)
- Physical damage from drops, impacts, or crushing
- Unauthorized modifications or repairs
- Software issues caused by third-party applications
- Accessories like chargers, cables, or cases (these have separate 1-year coverage)
- Normal wear and tear, including battery degradation above 80% capacity
This is where AppleCare+ demonstrates its value—it covers accidental damage incidents that would otherwise result in full-price repairs often exceeding the cost of the AppleCare+ plan itself.
Strategic Warranty Management: Beyond Simple Checking

Advanced Apple users treat warranty management as an ongoing strategy rather than a one-time check. This approach can save thousands of dollars across multiple devices over time.
Create a Warranty Calendar
Set calendar reminders at strategic intervals:
- Day 45: Last chance to evaluate AppleCare+ purchase without inspection
- 30 days before expiration: Schedule any needed repairs while covered
- Expiration date: Reassess device condition and upgrade timing
Document Your Coverage
Take screenshots of your warranty status and save them with your device documentation. This creates a verifiable record useful for resale, insurance claims, or dispute resolution.
Conclusion: Making Your Apple Warranty Work for You
Performing an Apple warranty check is more than a technical task—it’s a financial planning tool that protects your investment and informs smart decisions about repairs, coverage extensions, and device lifecycles. By understanding the various checking methods, interpreting coverage status correctly, and strategically timing your actions, you transform warranty management from a reactive necessity into a proactive advantage.
Whether you’re managing a single iPhone or a household full of Apple devices, regular warranty monitoring ensures you’re never caught off-guard by expired coverage or missed opportunities for free service. Take five minutes today to check the warranty status of every Apple device you own—your wallet will thank you.
Remember: The best time to check your Apple warranty was when you first got your device. The second-best time is right now.


